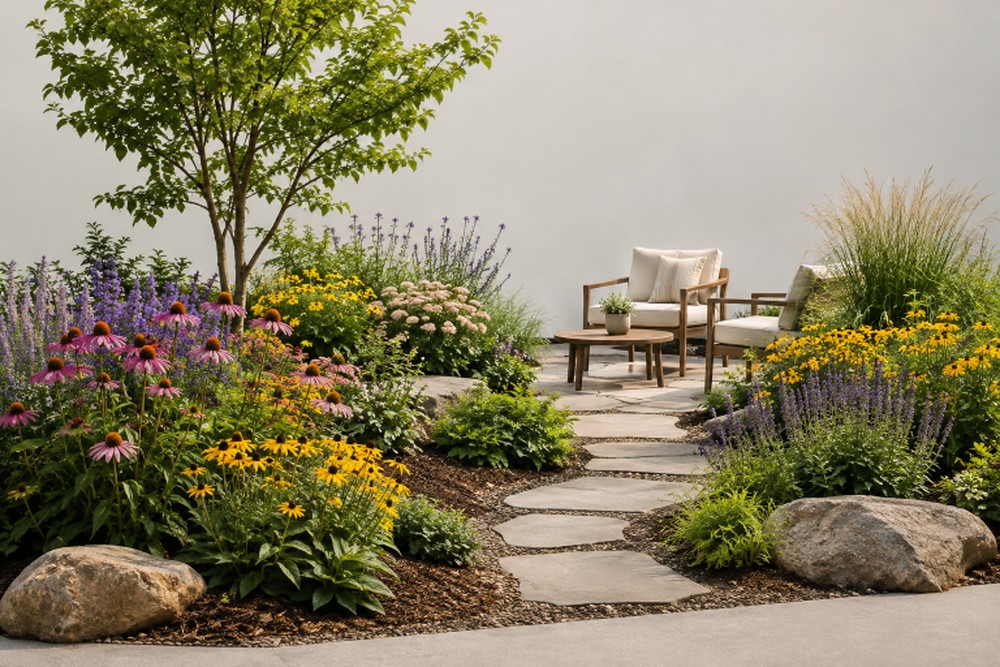
A pollinator-friendly yard can be colorful, comfortable, and practical at the same time. Thoughtful landscape construction helps connect planting beds with paths, patios, drainage features, and open space, so the property supports both wildlife and the people who use it every day. The goal is not to let the yard become overgrown or difficult to manage. A well-planned landscape can provide nectar, shelter, and nesting opportunities for pollinators while keeping room for outdoor meals, pets, play, gardening, and simple seasonal upkeep.
Why a Pollinator-Friendly Yard Works for Daily Life
Flowers can bring seasonal color and movement to a landscape, but a useful yard needs more than a collection of blooming plants. It also needs clear circulation, seating areas, accessible storage, and planting areas that do not interfere with gutters, gates, utility access, or regular maintenance. Even a modest property can provide useful habitat. The Smithsonian recommends planning for the food, shelter, water, and nesting opportunities that pollinators need, whether the space is a garden bed, raised planter, or container grouping. Food and shelter for insects and birds can fit into a well-organized residential landscape without taking over the entire yard.
Step 1: Check the Site Before Planting
Start by observing the property before choosing plants or materials. Track where sunlight falls in the morning, afternoon, and evening. Notice puddles after rain, compacted soil near walkways, downspouts, slopes, existing trees, and the routes people and pets already use. A bed that seems sunny in early spring may become shaded once nearby trees leaf out. That difference can affect plant performance throughout the summer. Reviewing the view from important windows also helps place taller plants where they add privacy or interest rather than block a preferred sightline.
Step 2: Choose Plants for More Than One Season
Select plants for their long-term role in the landscape, not only for how they look at the nursery. Use regionally appropriate native plants as a foundation, then choose species that suit the actual light, moisture, soil, and available space on the property. A layered mix of ground covers, perennials, shrubs, and small trees can create structure while offering flowers across multiple seasons. The U.S. Fish and Wildlife Service recommends including varieties that bloom from early spring through late fall and matching plant choices to local growing conditions. Native plant recommendations by region can provide a useful starting point before confirming selections with a local nursery or extension office.
- Plant similar species in groups rather than scattering single plants throughout the yard.
- Allow enough room for each plant’s mature width and height.
- Repeat a few dependable plant types to create a calmer, more intentional appearance.
- Include flowers with different shapes, along with foliage, grasses, shrubs, and seed heads for visual variety.
Step 3: Divide the Yard Into Useful Zones
Zones make a pollinator-friendly landscape easier to use and easier to understand. They do not need rigid walls or formal borders. A path, edging line, shift in plant height, paving material, or furniture placement can gently define each area.
Useful Zones to Consider
- Gathering zone: A patio, deck, or level surface for meals and conversation.
- Quiet zone: A bench, shaded corner, or small reading area.
- Habitat zone: Layered planting with flowers, shrubs, grasses, and protected cover.
- Movement zone: Clear routes connecting doors, driveways, gardens, and storage areas.
- Flexible zone: Open lawn or another adaptable surface for play, pets, or future changes.
Step 4: Pair Plants With Practical Hardscape
Hardscape should enhance the planted portions of the yard, not compete with them. Paths keep feet out of beds, while patios and seating areas provide a place to appreciate the garden. Low walls, steps, or raised beds can also help manage a slope and create clean transitions between elevations. Leave enough clearance for a hose, wheelbarrow, mower, and seasonal cleanup. Too much paving can make a yard feel hot and rigid, but too many loosely defined beds can make access difficult. Give each surface and planting area a clear purpose.
Step 5: Add Water, Cover, and Nesting Areas
Pollinators need more than flowers. A shallow water source with stones or another textured landing surface can provide safer access than a deep basin. Dense shrubs, ornamental grasses, and small trees can offer cover, while some open soil may be suitable for ground-nesting insects. A tidy landscape does not need to be completely bare in winter. Leaving selected stems, seed heads, and leaf cover in less visible areas can preserve seasonal texture and provide shelter. Keep paths and entries clear, and avoid placing water features where overflow or standing water could affect the home.
Step 6: Create a Simple Maintenance Routine
Low maintenance does mean no maintenance. It means choosing a landscape that matches the time and attention a household can realistically provide.
- Spring: Remove damaged growth, inspect drainage, and refresh path surfaces.
- Summer: Water newly installed plants deeply as needed, remove invasive growth, and watch for heat stress.
- Fall: Clear paths, inspect outdoor structures, and leave selected healthy seed heads in place.
- Winter: Protect young plants where needed and avoid unnecessary heavy cleanup in habitat areas.
Common Planning Mistakes to Avoid
- Buying plants before understanding sunlight, drainage, and soil conditions.
- Using only one bloom period or one plant type.
- Planting too closely and overlooking mature size.
- Blocking drains, gates, paths, or utility access.
- Choosing invasive plants simply because they grow quickly.
- Installing a water feature without considering cleaning, safety, and drainage.
- Removing every leaf and stem during fall cleanup.
- Trying to complete the full yard before learning how the site performs.
How to Build the Plan in Stages
A phased plan can make a major yard improvement more manageable. Begin with drainage, access, and circulation because later work depends on them. Next, create the main outdoor living area, then add planting beds and seasonal color. Shade trees, lighting, water features, and other enhancements can be implemented after the landscape has been observed for a full growing season.
Common Questions
Does a Pollinator-Friendly Yard Need to Look Wild?
No. Repeated plant groupings, defined edges, well-maintained paths, and intentional seating can make the space feel neat while still supporting wildlife.
Can a Small Yard Support Pollinators?
Yes. Containers, narrow borders, raised beds, and small planting pockets can add food and cover when the plants are suited to the site.
Should Every Plant Be Native?
Native plants are a strong foundation because they are adapted to regional conditions. A local plant professional can help identify suitable options for the specific property.
Final Takeaway
The most successful pollinator-friendly yards balance habitat with everyday function rather than treating wildlife support and outdoor living as separate goals. Start with the site by observing sunlight, soil, drainage, wind, and existing vegetation, then plan clear areas for movement, gathering, gardening, and quiet time. Select a mix of plants that provide flowers, shelter, and food across several seasons, choosing species suited to the property’s conditions and the level of care available. Avoid overcrowding the space and leave enough room for plants to mature naturally. Building in stages can also make it easier to adjust the landscape as you learn what works best. The result can be an outdoor space that feels welcoming, useful, and alive throughout more of the year while providing valuable habitat for pollinators and other beneficial wildlife.